
Python-Pytube,Selenium
Data 수집
DeepLearning의 Model을 Trainning 하기 위하여 많은 Data수집을 필요로한다.
이번 Post는 이러한 Data수집을 편하게 하는 Moduel 중 Pytube 와 Selenium의 작동 방식과 예제를 살펴보자.
먼저 여러가지의 기능을 넣어서 사용하므로 사용방법과 Exception에 대해서 알아보자.
먼저 공통적인 Exception을 다루는 Code는 아래와 같다.
1
2
3
4
5
6
7
8
9
10
11
12
13
14
15
16
17
18
19
20
21
def print_exception(mode=0):
    if(mode == 1):
        print('System Argument must 3 or 4 or 5')
        print('--version: 1, 2, 3, 4, 5 or Youtube, ...')

    else:
        print('------System Argument 4------')
        print("1. Youtube")
        print("2. VscodeMarketplace")
        print('python crawling.py URL Destination --version')

        print("3. Download images by keyword")
        print('python crawling.py Keyword Destination --version')

        print('------System Argument 3------')
        print("4. GoogleDrive")
        print('python crawling.py URL --version')

        print('------System Argument 5------')
        print("5. Auto Login")
        print("Usage: python crawling.py URL ID Pwd --version")
위의 Code는 간단하게 작성자가 짜놓은 예외처리에 따라 Error Message를 매번 출력을 쉽게 하기 위해서 따로 선언한 Method이다.
아래 Main 문을 보게 되면 위의 Exception처리를 왜하는지 알 수 있다.
1
2
3
4
5
6
7
8
9
10
11
12
13
14
15
16
17
18
19
20
21
22
23
24
25
26
27
28
29
30
31
32
33
34
35
36
37
38
39
40
41
42
43
44
45
46
47
48
49
if __name__ == "__main__":
    if len(sys.argv) < 3 or len(sys.argv) > 5:
        print_exception(1)

    elif len(sys.argv) is 3:
        target_url = sys.argv[1]
        version = sys.argv[2]

        if(version == '--4' or version == 'GoogleDrive'):
            download_file_from_google_drive(target_url)
        else:
            print_exception()

    elif len(sys.argv) is 5:
        target_url = sys.argv[1]
        t_id = sys.argv[2]
        t_pwd = sys.argv[3]
        version = sys.argv[4]

        if(version == '--5' or version == 'Auto Login'):
            auto_login(target_url, t_id, t_pwd)
        else:
            print_exception()

    else:
        # TAKE ID FROM SHAREABLE LINK
        file_id = sys.argv[1]
        # DESTINATION FILE ON YOUR DISK
        destination = sys.argv[2]

        # Destination 존재 X 시 만듬
        if not os.path.isdir(destination):
            os.mkdir(destination)

        # File 저장하기 위하여 destination 통일
        if destination[-1:] == '/':
            pass
        else:
            destination = destination + '/'

        version = sys.argv[3]
        if(version == '--1' or version == 'Youtube'):
            youtube_download(file_id,destination)
        elif(version == '--2' or version == 'VscodeMarketplace'):
            vscode_download(file_id, destination)
        elif(version == '--3' or version == 'Download images by keyword'):
            download_images_by_keyword(file_id, destination)
        else:
            print_exception()
위의 Code를 상황을 나누어서 간단하게 실행 방법과 어떻게 작동하는 지 알아보자.
사용방법
-
현재 python 파일에서는 요구되는 argument가 3, 4, 5 이고 argument 수가 맞지 않으면 Error 발생
-
Youtube Download: python3 Crawling.py [URL] [Destination] [–1 or Youtube] 위의 코드로서 명령어를 실행하게 되면 Destination에 URL의 Youtube 동영상이 .mp4형식으로 저장된다.
Example)python3 Crawling.py https://www.youtube.com/watch?v=KS_u69yEP00 ./youtube_download --1
결과
-
Vscode MarketPlace Download: python3 Crawling.py [URL] [Destination] [–2 or VscodeMarketplace] 위의 코드로서 명령어를 실행하게 되면 Destination에 URL의 Vscode MarketPlace에서 제공하는 API가 다운 가능하다.
Example)python3 Crawling.py https://marketplace.visualstudio.com/items?itemName=ms-azuretools.vscode-docker ./docker_download --2결과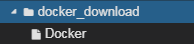
-
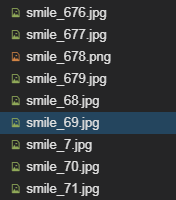
Download images by keyword: python3 Crawling.py [Keyword] [Destination] [–3 or Download images by keyword] 위의 코드로서 명령어를 실행하게 되면 Destination에 명령어로 입력한 Keyword에 관한 Image가 Naver 와 Google에서 Crawling하여 가져온다.
Example)python3 Crawling.py smile ./image_download --3
결과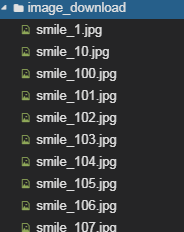
-
GoogleDrive Download: python3 Crawling.py [URL] [–4 or GoogleDrive]
위의 코드로서 명령어를 URL의 GoogleDrive파일을 모두 다운로드 가능하다.
이 명령어는 후에 Update가 필요하다. 일반적으로 받는 방법보다 매우 느리고, 저장 경로를 현재 지정할 수 없다는 단점이 존재하기 때문이다.(권장하지 않는다.)
Example)python3 Crawling.py http://bit.ly/2U7ttYT --4 -
Auto Login: python3 Crawling.py [URL(Naver or Google)] [ID] [Passward] [–5 or Auto Login] 위의 코드로서 명령어를 실행하게 되면 Naver or Google에 입력한 계정으로 접속할 수 있다.
Example)python3 Crawling.py https://www.naver.com ID Passward --5
결과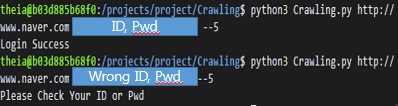
Pytube
Pytube는 Python에서 Youtube 영상을 간단하게 다운로드 받을 수 있도록 만들어진 Module이다.
아래 PyPi를 사용하는 명령어로 쉽게 pytube를 다운받을 수 있다.
pip3 install pytube
상세한 작동방식은 아래 정식 pytube를 참조하면 된다.
Pytube 정식 홈페이지
Youtube에서 Data수집을 mp4 형식으로 다운받는 코드이다.
1
2
3
4
5
def youtube_download(id,destination):
    yt = YouTube(id)
    parent_dir = destination
    yt.streams.filter(subtype='mp4').first().download(parent_dir)
    print('Download Success')
Pytube를 활용하여 YouTube를 다운받기 위해서는 YouTube클래스를 불러온다.
YouTube 객체는 YouTube(‘url’)의 형식으로 생성할 수 있다. url은 받고싶은 Youtube의 영상 url을 String형태로 넣어준 것이다.
Youtube.stream.filter(subtype = ‘mp4’)를 통하여 다운 받을 수 있는 mp4의 여러 목록을 조회한다.
.first()를 통하여 가장 고화질의 파일을 선택한다.
.download(parenet_dir)을 통하여 youtube동영상을 원하는 Destination에 다운로드 한다.
Pytube의 자세한 내용을 참고하고 싶다면 아래 링크 참조
Pytube 자세한 사용 방법
주의 사항
- 현재 사용하는 Pytube-9.5.2는 Title을 가져올 수 없는 Error 발생
아래 링크의 내용을 site-packages/pytube/ _ _ main _ _ .py를 고쳐야 Title을 가져올 수 있다.
pytube/ _ _ main _ _ .py - Ascii Encodeing Error 발생시
1) Python3 사용 & # - * - coding: utf-8 - * -
2) 위에 방법대로 해도 계속 Error발생시 Ubuntu 환경이면 아래 순서 참조
$ locale 실행: 만약 UTF-8로서 지정되어 있지 않으면
$ locale -a 실행: 사용가능한 Language 목록 출력
$ export LANG = C.UTF-8로 변경
Selenium
Selenium은 주로 웹앱을 테스트하는데 이요하는 프레임 워크이다.
webdriver라는 API를 통해 운영 체제에 설치된 Chrome등의 브라우저를 제어한다.
브라우저를 직접 동작시킨다는 것은 JavaScript를 이용해 비동기적으로 혹은 뒤늦게 불러와지는 컨텐츠들을 가져올 수 있게 된다.
즉, 사용자의 행동을 동적으로 추가하려면 beautifulsoup이 아닌selenium이 필요하게 된다.
단 beautifulsoup은 HTML의 Text를 DOM형식으로 그대로 가져와서 Child등 Tree구조에 쉽게 접근 할 수 있다는 장점이 있지만, selenium에서는 불가능하다.
selenium 설치
pip3 install selenium
webdriver 설치
현재 작성자의 환경은 Ubuntu 기반 Linux이므로 chromnium으로서 환경을 구축하였다.
- chromium설치: sudo apt install chromium-browser
- chromium version 확인: chromium-browser –version
=> Chromium 76.0.3809.100 Built on Ubuntu , running on Ubuntu 18.04 - Version에 맞는 Chromedriver설치: ChromeDriver 설치 사이트
Selenium의 세세한 부분은 아래 예제를 다루면서 설명하고 공통적으로 사용하는 부분에 대해서 알아보자.
webdriver import
1
from selenium import webdriver
현재 Ubuntun Server는 CLI 로서 GUI기능이 없기 때문에 일반적으로 selenium으로서 사용하는 창을 띄워서 브라우징이 불가능 하다.
따라서 ‘화면’이 존재하지 않게 selenium을 사용하기 위하여 Option설정 및 추가가 필요하다.
Option을 추가한 뒤 webdriver를 불러오기 위하여 위에서 다운받은 webdriver의 위치를 알고 적용시켜야 한다.
또한 암묵적으로 모든 자원이 로드될때 까지 기다리게 시간을 직접 .implicitly_wait()으로 설정 가능하다.
Option 설정 및 객체 생성
1
2
3
4
5
6
7
8
chrome_options = webdriver.ChromeOptions()

    chrome_options.add_argument('--headless')
    chrome_options.add_argument('--no-sandbox')
    chrome_options.add_argument('--disable-dev-shm-usage')

    driver = webdriver.Chrome(executable_path="./chromedriver",options=chrome_options)
    driver.implicitly_wait(3)
Selenium이 제공하는 Method
URL에 접근
- get(URL)
페이지 단일 element에 접근
- driver.find_element
- driver.find_element_by_id
- driver.find_element_by_xpath
- driver.find_element_by_class_name
페이지 다중 element에 접근
- driver.find_elements
- driver.find_element_by_ids
- driver.find_element_by_xpaths
- driver.find_element_by_class_names
추가 사항
현재 GUI환경에서는 Web Browser가 뜨면서 작동하기 때문에 바로바로 어떠한 상황에서 Error가 발생하는지 알 수 있다.
CLI에서는 불가능 하므로 다음 명령어를 사용하자.
driver.save_screenshot(‘image.png’)
위의 명령어를 통하여 상황이 어떻게 진행되는지 image파일로 저장하고 확인할 수 있다.
Vscode MarketPlace Download
Vscode MarketPlace Download를 받기위하여 https://marketplace.visualstudio.com/ 에 접속하여 받고싶은 API를 다운받기 위하여 Install을 누르면 다운이 안되는것을 확인할 수 있다.
직접 다운받을수 있는 Link를 알기 위하여 아래와 같은 작업이 필요하다.
- Vscode Market Place접속후 API검색
- 해당 Page의 More Info, API 이름 가져오기
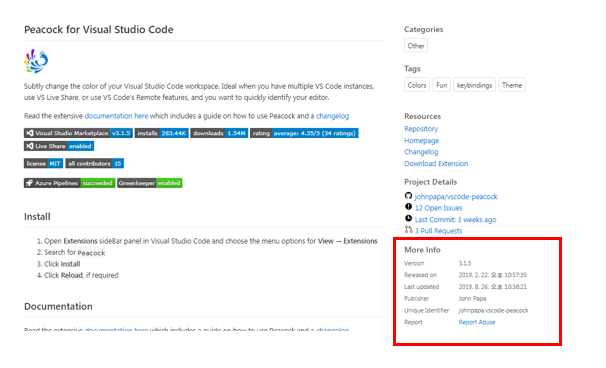
- More Info에서 원하는 정보 가져오기
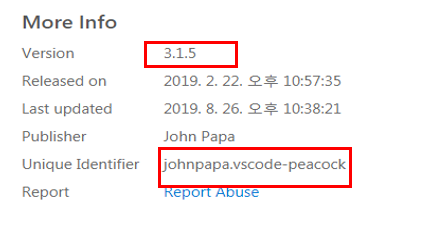
- Unique Identifier를 . 을 기준으로 나누어서 publisher . extensionname으로서 구별하기
- Download URL아래와 같이 재조합
https://${publisher}.gallery.vsassets.io/_apis/public/gallery/publisher/${publisher}/extension/${extensionname}/${version}/assetbyname/Microsoft.VisualStudio.Services.VSIXPackage - wget으로서 해당 URL 요청및 파일이름 변경
- wget 요청시 SSL connection error 가 발생하므로 –no-check-certificate Option 추가
아래 코드는 Vscode MarketPlace에서 제공하는 API를 위의 순서대로 실행하는 Code이다.
1
2
3
4
5
6
7
8
9
10
11
12
13
14
15
16
17
18
19
20
21
22
23
24
25
26
27
28
29
30
31
32
33
34
35
36
37
38
39
40
41
42
43
def vscode_download(id, destination):

    #CLI 에서도 작동하기 위한 Option
    chrome_options = webdriver.ChromeOptions()

    chrome_options.add_argument('--headless')
    chrome_options.add_argument('--no-sandbox')
    chrome_options.add_argument('--disable-dev-shm-usage')

    browser = webdriver.Chrome(executable_path="./chromedriver",options=chrome_options)

    browser.implicitly_wait(2)

    url = id
    browser.get(url)

    print('Find URL...')

    #More Info에서 필요한 정보와 API 이름 가져오는 작업
    version=browser.find_element_by_xpath('//*[@id="overviewTab"]/div/table/tbody/tr/td[2]/div[3]/div[4]/div/table/tbody/tr[1]/td[2]/div').text
    unique_identifier=browser.find_element_by_xpath('//*[@id="overviewTab"]/div/table/tbody/tr/td[2]/div[3]/div[4]/div/table/tbody/tr[6]/td[2]').text

    vscode_name = browser.find_element_by_xpath('//*[@id="section-banner"]/div/table/tbody/tr/td[2]/div/h1/span').text

    publisher,extensionname = unique_identifier.split('.')

    #URL 재조합
    down_link = 'https://{}.gallery.vsassets.io/_apis/public/gallery/publisher/{}/extension/{}/{}/assetbyname/Microsoft.VisualStudio.Services.VSIXPackage'.format(publisher,publisher,extensionname,version)

    destination = destination + vscode_name
    print(destination)

    #Unable to establish SSL connection error => --no-check-certificate Option 추가
    command=["wget",'--no-check-certificate', down_link, "-O", destination]

    print('Downloading...')
    try:
        subprocess.call(command)
        print('Download Success')
    except Exception as e:
        print(e)

    browser.close()
Download images by keyword
Keyword와 Destination을 입력받고 해당 Keyword의 이미지를 가져오는 과정이다.
Image를 받는 사이트의 경우 한국에서 유명한 네이버와 전세계적으로 유명한 Google 두 사이트를 사용하였다.
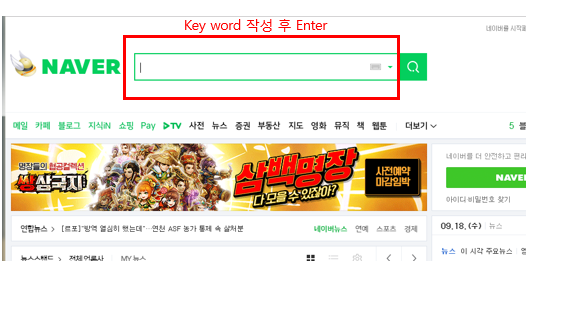
네이버 Image Crawling 과정
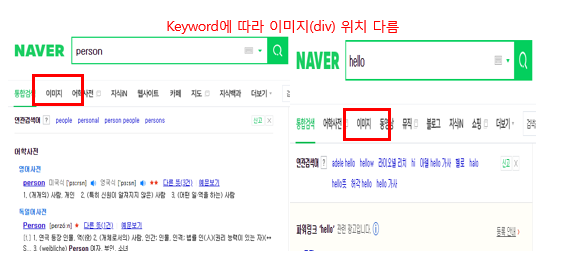
- Naver 접속후 Keyword 검색
- Xpath를 사용하므로 다음과 같이 이미지 DIV 의 위치가 바뀔수 있는것 생각하여 선택
- 많은 사진을 가져오기 위하여 스크롤 작업
- 해당 페이지내의 image 주소 검색 후 저장
- urllib을 통하여 image Download
Google Image Crawling 과정
Google의 경우 Naver와 비슷하지만 중요하게 추가해야 하는 부분이 존재 한다.
1
2
    header={'User-Agent':"Mozilla/5.0 (Windows NT 6.1; WOW64) AppleWebKit/537.36 (KHTML, like Gecko) Chrome/43.0.2357.134 Safari/537.36"}
req = urllib.request.Request(img, headers=header)
위의 Code에서도 알 수 있듯이 Google인 경우 Bot이 아니라는 Header를 추가해야지 Image를 다운받을 수 있다.
아래 코드는 Naver와 Google에서 해당 Keyword에 해당하는 Image를 Crawling하는 Code이다.
1
2
3
4
5
6
7
8
9
10
11
12
13
14
15
16
17
18
19
20
21
22
23
24
25
26
27
28
29
30
31
32
33
34
35
36
37
38
39
40
41
42
43
44
45
46
47
48
49
50
51
52
53
54
55
56
57
58
59
60
61
62
63
64
65
66
67
68
69
70
71
72
73
74
75
76
77
78
79
80
81
82
83
84
85
86
87
88
89
90
91
92
93
94
95
96
97
98
99
100
101
102
103
104
105
def download_images_by_keyword(file_id, destination):

    chrome_options = webdriver.ChromeOptions()

    chrome_options.add_argument('--headless')
    chrome_options.add_argument('--no-sandbox')
    chrome_options.add_argument('--disable-dev-shm-usage')

    driver = webdriver.Chrome(executable_path="./chromedriver",options=chrome_options)

    driver.implicitly_wait(3)

    url = 'https://www.naver.com/'
    driver.get(url)

    keyword = file_id
    driver.find_element_by_xpath('//*[@id="query"]').send_keys(keyword)
    driver.find_element_by_xpath('//*[@id="query"]').send_keys(Keys.ENTER)

    driver.find_element
    image_text = driver.find_element_by_xpath('//*[@id="lnb"]/div/div[1]/ul/li[2]/a/span').text
    if image_text == "이미지":
        driver.find_element_by_xpath('//*[@id="lnb"]/div/div[1]/ul/li[2]/a/span').click()
    else:
        driver.find_element_by_xpath('//*[@id="lnb"]/div/div[1]/ul/li[3]/a/span').click()

    print('Find Keyword...')

    for i in range(1000):
    # 가로 = 0, 세로 = 10000 픽셀 스크롤한다.
        driver.execute_script("window.scrollBy(0,10000)")


    link = []
    image_count = 0

    for j in range(2,8):
        for i in range(1,50):
            try:
                img = driver.find_element_by_xpath('//*[@id="_sau_imageTab"]/div[2]/div['+str(j)+']/div['+str(i)+']/a[1]/img')
                image_count = image_count+1
                link.append(img.get_attribute('src'))
            except:
                try:
                    img = driver.find_element_by_xpath('//*[@id="_sau_imageTab"]/div[1]/div['+str(j)+']/div['+str(i)+']/a[1]/img')
                    image_count = image_count+1
                    link.append(img.get_attribute('src'))
                except:
                    pass


    count = 0
    print('Downloading...')
    for url in link:
        count+=1
        urllib.request.urlretrieve(url,destination+keyword+'_'+str(count)+'.jpg')

    print('Naver', count, 'Success')


    #Google Download
    searchterm = file_id
    url = "https://www.google.com/search?q="+searchterm+"&source=lnms&tbm=isch"

    driver.get(url)

    header={'User-Agent':"Mozilla/5.0 (Windows NT 6.1; WOW64) AppleWebKit/537.36 (KHTML, like Gecko) Chrome/43.0.2357.134 Safari/537.36"}

    # 이미지 카운트 (이미지 저장할 때 사용하기 위해서)
    counter = count
    succounter = 0

    print('Find Keyword')
    for _ in range(500):
        # 가로 = 0, 세로 = 10000 픽셀 스크롤한다.
        driver.execute_script("window.scrollBy(0,10000)")

    print('Downloading...')
    # div태그에서 class name이 rg_meta인 것을 찾아온다
    for x in driver.find_elements_by_xpath('//div[contains(@class,"rg_meta")]'):
        counter = counter + 1

        # 이미지 url
        img = json.loads(x.get_attribute('innerHTML'))["ou"]
        imgtype = json.loads(x.get_attribute('innerHTML'))["ity"]

        # 구글 이미지를 읽고 저장한다.
        try:
            req = urllib.request.Request(img, headers=header)
            raw_img = urllib.request.urlopen(req).read()
            File = open(os.path.join(destination , searchterm + "_" + str(counter) + "." + imgtype), "wb")
            File.write(raw_img)
            File.close()
            succounter = succounter + 1

        except:
            pass

    print('Google', succounter, 'Success')
    print('Total',counter,'Success')

    driver.close()
GoogleDrive Download
GoogleDrive에 접속하여 해당 URL의 전체 File을 가져오는 작업이다.
현재 작성한 방식은 매우 느리고 부하가 많이 걸린다는 단점이 생겨서 다른 방식에 대해서 알아봐야 한다.
GoogleDriver를 받기 위한 과정을 아래 그림과 같다.
- GoogleDriver접속 후 전체 다운로드 클릭
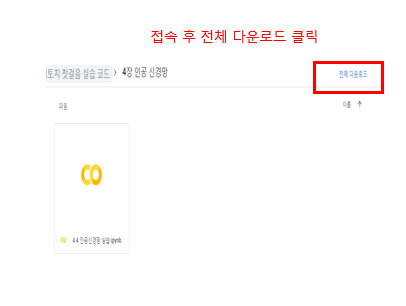
- 현재 상황을 알 수 있게 Print하여 상황 출력
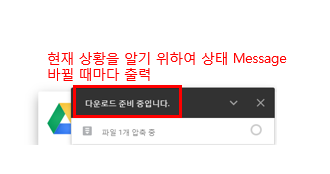
- 일정시간 마다 Alert창 확인 하여 accpt대기 및 상황 변화 감시
이 부분이 계속하여 Alert을 확인하고 Accept을 해야 하는 부분이므로 자원 낭비이자 부하가 많이 걸리는 작업으로 생각된다.
또한 Alert 창이 뜨는 경우도 있고 없는 경우도 존재하기 때문에 보편성에서 부족하다고 할 수 있다.
아래 코드는 GoogleDriver Page에서 전체 Download하는 Code이다.
1
2
3
4
5
6
7
8
9
10
11
12
13
14
15
16
17
18
19
20
21
22
23
24
25
26
27
28
29
30
31
32
33
34
35
36
37
def download_file_from_google_drive(target_url):
    global driver
    chrome_options = webdriver.ChromeOptions()

    chrome_options.add_argument('--headless')
    chrome_options.add_argument('--no-sandbox')
    chrome_options.add_argument('--disable-dev-shm-usage')

    driver = webdriver.Chrome(executable_path="./chromedriver",options=chrome_options)

    driver.implicitly_wait(3)
    url = target_url
    driver.get(url)
    driver.find_element_by_xpath('//*[@id="drive_main_page"]/div[2]/div[1]/div[1]/div/div/div[2]/div/div/div[2]/div/div[2]/div/div[1]').click()


    text = driver.find_element_by_xpath('/html/body/div[10]/div[1]/div/div[1]/span').text
    print(text)
    check = file_status_notification(driver)
    if not check:
        print('Downloading Timeout')
    driver.close()


def file_status_notification(driver):
    chk = False
    for i in range(400):
        try:
            time.sleep(3)
            alert = driver.switch_to.alert
            alert.accept()
            print('Download Success')
            chk = True
            break
        except Exception as e:
            pass
    return chk
Auto Login
ID와 Passward을 입력받고 해당 URL에 로그인을 하는 과정이다.
네이버 Auto Login 과정
- Naver 접속 후 Login Click
- ID 입력
네이버의 경우 ID와 Passward에 빠르게 입력하는 것을 Bot이라고 생각해서 보안문자를 입력하게 적용된다. 따라서 아래 Code와 같이 Script에 직접 값을 입력하여 Login을 해야 한다.1 2
driver.execute_script("document.getElementsByName('id')[0].value=\'" + t_id + "\'") driver.execute_script("document.getElementsByName('pw')[0].value=\'" + t_pwd + "\'")
- 많은 사진을 가져오기 위하여 스크롤 작업
- 해당 페이지내의 image 주소 검색 후 저장
- urllib을 통하여 image Download
Google Auto Login 과정
Google의 경우 Naver와 비슷하지만 Google Image Crawling와 같이 Header에 Bot이 아니라는 것을 명시해야지 정상적으로 작동하는 것을 알 수 있다.
위의 Google Image Crawling과 다르게 Driver Option자체에 추가하였다.
1
    chrome_options.add_argument("user-agent=Mozilla/5.0 (Macintosh; Intel Mac OS X 10_12_6) AppleWebKit/537.36 (KHTML, like Gecko) Chrome/61.0.3163.100 Safari/537.36")
아래 Code는 Naver혹은 Google에 Auto Login하는 과정이다.
1
2
3
4
5
6
7
8
9
10
11
12
13
14
15
16
17
18
19
20
21
22
23
24
25
26
27
28
29
30
31
32
33
34
35
36
37
38
39
40
41
42
43
44
45
46
47
48
49
50
51
52
53
54
55
56
57
def auto_login(target_url, t_id, t_pwd):
    chrome_options = webdriver.ChromeOptions()

    chrome_options.add_argument('--headless')
    chrome_options.add_argument('--no-sandbox')
    chrome_options.add_argument('--disable-dev-shm-usage')
    chrome_options.add_argument("user-agent=Mozilla/5.0 (Macintosh; Intel Mac OS X 10_12_6) AppleWebKit/537.36 (KHTML, like Gecko) Chrome/61.0.3163.100 Safari/537.36")

    driver = webdriver.Chrome(executable_path="./chromedriver",options=chrome_options)

    driver.implicitly_wait(3)

    url = target_url

    if(url == 'https://www.google.com' or url == 'http://www.google.com'):
        driver.get(url)

        driver.find_element_by_xpath('//*[@id="gb_70"]').click()


        time.sleep(1)
        driver.find_element_by_id('identifierId').send_keys(t_id)
        time.sleep(1)
        driver.find_element_by_xpath('//*[@id="identifierNext"]/span/span').click()

        try:
            time.sleep(1)
            driver.find_element_by_xpath('//*[@id="password"]/div[1]/div/div[1]/input').send_keys(t_pwd)
            time.sleep(1)
            driver.find_element_by_xpath('//*[@id="passwordNext"]/span/span').click()
            time.sleep(2)
            try:
                driver.find_element_by_xpath('//*[@id="tsf"]/div[2]/div[1]/div[1]/div/div[2]/input')
                print('Login Success')
            except:
                print('Check Your Pwd')
        except:
            print("Check Your ID")


    elif(url == 'https://www.naver.com' or url == 'http://www.naver.com'):
        driver.get(url)
        driver.find_element_by_xpath('//*[@id="account"]/div/a/i').click()
        driver.execute_script("document.getElementsByName('id')[0].value=\'" + t_id + "\'")
        driver.execute_script("document.getElementsByName('pw')[0].value=\'" + t_pwd + "\'")
        driver.find_element_by_xpath('//*[@id="frmNIDLogin"]/fieldset/input').click()

        time.sleep(2)
        try:
            driver.find_element_by_xpath('//*[@id="query"]')
            print('Login Success')
        except:
            print('Please Check Your ID or Pwd')

    else:
        print('Please Check Your URL for example) https://www.naver.com')
    driver.close()
참조: 원본코드
참조: beomi 블로그
참조: mslee89 블로그
참조: Pytube 정식 홈페이지
참조: seolin 블로그
문제가 있거나 궁금한 점이 있으면 wjddyd66@naver.com으로 Mail을 남겨주세요.
Leave a comment