
JupyterNotebook
Why use Jupyter Notebooks in Kubeflow
Kubeflow에서 Jupyter Notebooks를 사용하는 이유를 다음과 같은 2가지 이유로 설명하고 있다.
Integrating well with the rest of the infrastructure with respect to authentication and access control.
인증 및 엑세스 제어와 관련하여 나머지 인프로와 잘 통합된다.
Enabling easier notebook sharing across the organization. Users can create notebook containers or pods directly in the cluster, rather than locally on their workstations. Admins can provide standard notebook images for their organization, and set up role-based access control (RBAC), Secrets and Credentials to manage which teams and individuals can access the notebooks.
관리자는 Kubernetes의 RBAC를 통하여 쉽게 Access 제어를 할 수 있다.
또한 User는 cluster의 pod이나 container에 자신의 환경에 맞게 개별적으로 Notebook환경을 설정할 수 있다.
즉, 사용자마다 Python, Tensorflow등 Version이 다르게 구축할 수 있고 이러한 환경과 Code를 사용자 전체와 공유할 수 있다는 장점이 발생한다.
When you bundle Jupyter Notebooks in Kubeflow, you can use the Fairing library to submit training jobs using TFJob
또한 Jupyter Notebooks는 Kubeflow가 지원하는 TFJob을 통하여 Trainning시킬 수 있다.
Multi-user Isolation
본격적인 Jupyter Notebooks를 알아보기 이전에 사용하고자 하는 곳이 회사나 다른 조직이라고 생각하였을 때 다수의 사용자를 등록시켜야 하는 일이 발생한다.
먼저 처음 Kubeflow에 접속하게 되면 임의의 User를 생성할 수 있다.
간단한 profile을 소개한다.

User는 이름을 지정하고 등록할 수 있다.
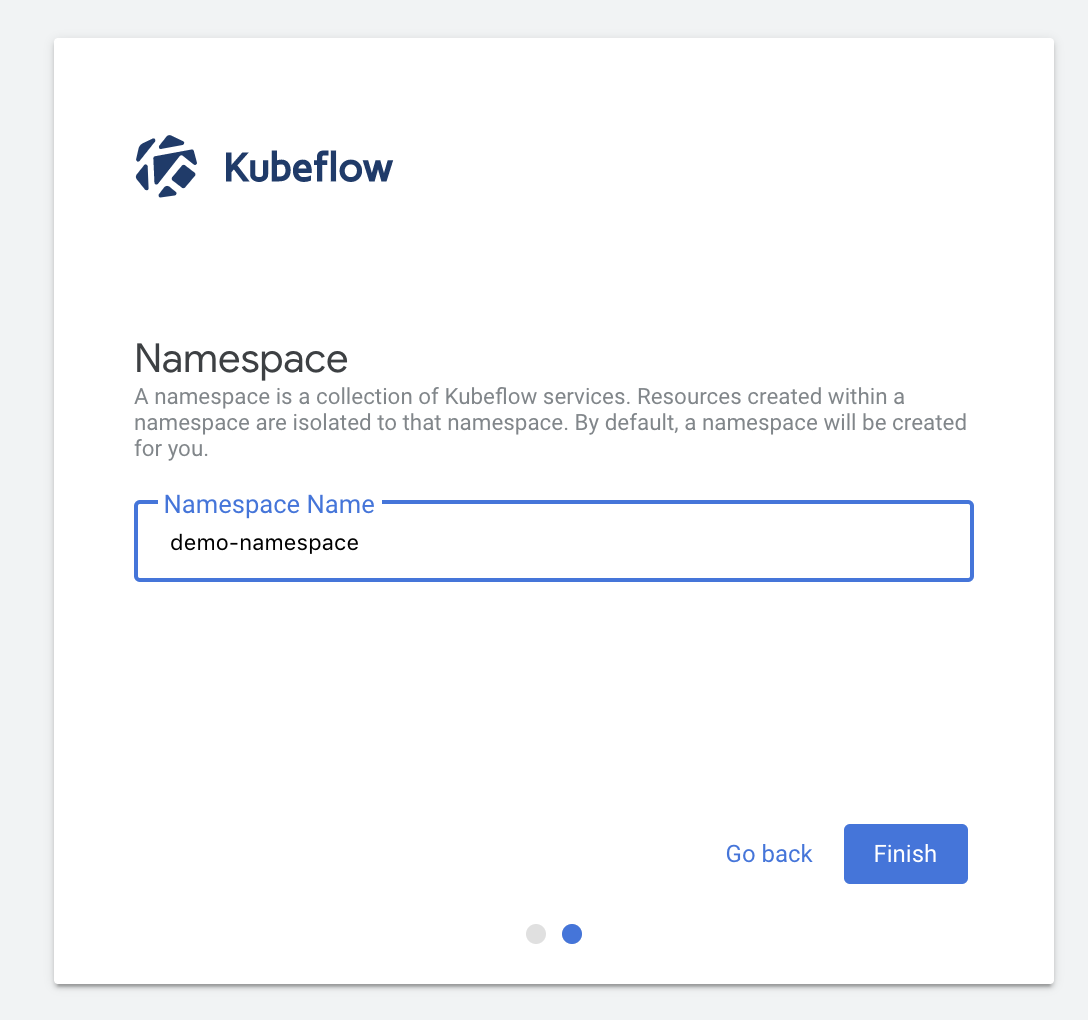
초창기 이후의 User는 관리자를 통하여 등록시킬 수 있다.
먼저 Object Spec을 정의한다.
apiVersion: kubeflow.org/v1beta1
kind: Profile
metadata:
        name: wjddyd1
spec:
        owner:
                kind: User
                name: wjddyd1@naver.com
---
apiVersion: kubeflow.org/v1beta1
kind: Profile
metadata:
        name: wjddyd2
spec:
        owner:
                kind: User
                name: wjddyd2@naver.com
위의 변수들은 말 그대로 Profile의 Object를 생성하는데 각각의 User에 대한 name과 email을 생성하여 지정한다.
kubectl명령어를 통하여 Object Spec의 명시한 대로 Object를 생성한다.
kubectl create -f profile.yaml
profile.kubeflow.org/wjddyd1 created
profile.kubeflow.org/wjddyd2 created
생성한 profile객체를 확인할 수 있다.
kubectl get profiles
NAME      AGE
jyhwang   24h
wjddyd1   40s
wjddyd2   40s
초창기에 생성한 jyhwang과 추가한 User wjddyd1, wjddyd2가 생성된것을 확인할 수 있다.
더 자세한 내용을 알기위한 describe도 지원한다.
kubectl describe profile wjddyd1
Name:         wjddyd1
Namespace:
Labels:       <none>
Annotations:  <none>
API Version:  kubeflow.org/v1beta1
Kind:         Profile
Metadata:
  Creation Timestamp:  2019-11-14T01:23:49Z
  Finalizers:
    profile-finalizer
  Generation:        2
  Resource Version:  495520
  Self Link:         /apis/kubeflow.org/v1beta1/profiles/wjddyd1
  UID:               55cac053-49a0-43bc-83b0-6d40cf83be00
Spec:
  Owner:
    Kind:  User
    Name:  wjddyd1@naver.com
  Resource Quota Spec:
Events:  <none>
등록한 Profile은 관리자가 삭제할 수 도 있다.
kubectl delete profile <profileName>
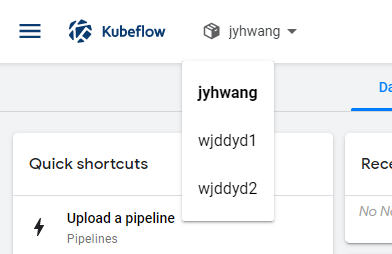
실제 Kubeflow에 들어가서 확인결과 User가 모두 정상등록된 것을 알 수 있다.
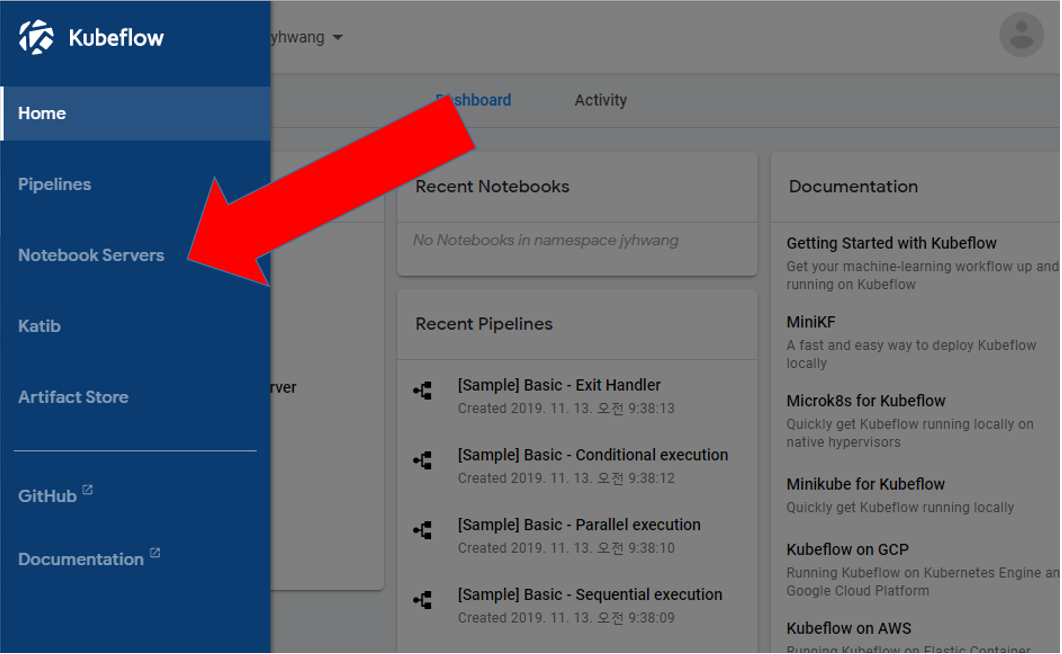
Set Up Your Notebooks
먼저 왼쪽 상단에 존재하는 Notebook Servers 클릭
Name space 선택 후 Nerwerver 선택

Notebook 환경 설정
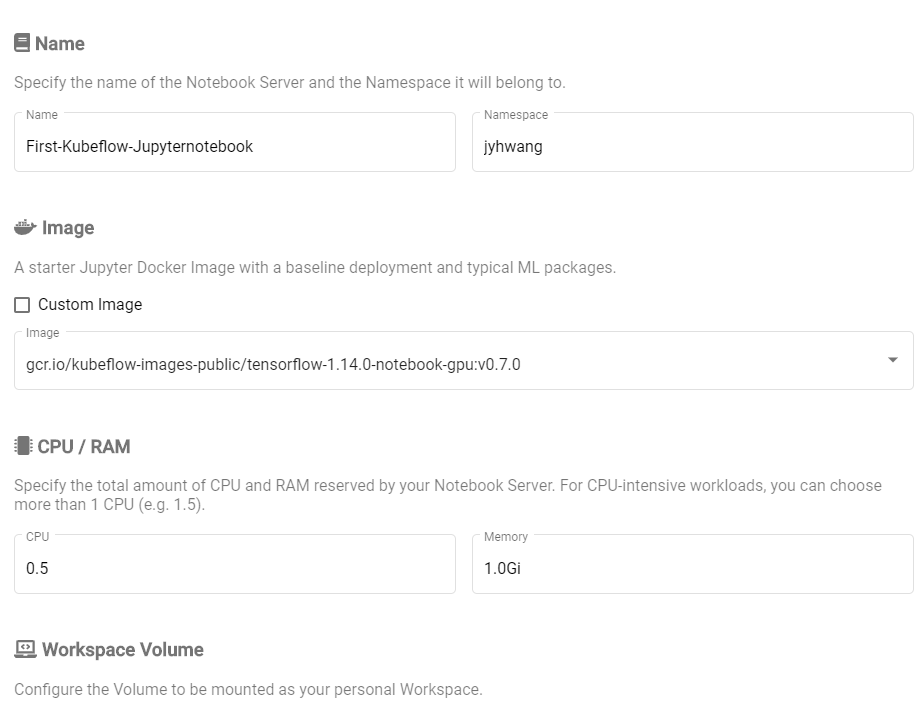
위와 같은 환경에서 다양한 환경을 지정할 수 있다.
| 변수 | 설명 |
| Name | Notebook Server Name(문자나 숫자 가능, 공백 X) |
| Namespace | User의 이름과 동일하게 정해진다. Namespace를 통하여 서로 접근가능 |
| image | Image는 Docker Image로서 Pull해서 넣은 Image의 목록이 나온다. 주의해야 하는 점은 GPU를 사용하는 Tensorflow나 다른 환경을 지정하기 위해서는 GPU를 사용 가능해야 한다. |
| Custom | Customize한 Jupyter의 Image사용 가능 |
| CPU, GPU | 사용가능한 CPU, GPU설정 (1이상도 가능) |
| Memory | RAM |
| workspace volume |
|
| Data Volumes | 하나 이상의 Data에 접근하기위한 장소, 즉 공용으로 사용하는 Dataset은 하나의 Path에 모아두고 링크를 걸면 각각의 Jupyter Notebooks에서 접근 가능하다. |
주의사항
자동으로 PV와 PVC, StorageClass가 생성되는 것이 당연하고, 재설치를 하였을때 자동으로 생겼습니다. 현재 어떤 Error인하여 생성되고 안되는지는 확인할 수 없으나 Jupyter Notebook생성시 Error없이 잘 설정되면 및의 과정은 필요없습니다. 또한 PV가 사용자에(NameSpace) 따라서 자동으로 PV의 위치를 지정합니다. 즉, 사용자끼리 Jupyter Notebook의 /home/jovyan에서 공통으로 이루워지지 않고, 다른 User는 이러한 Directory에 접근하지 못하도록 권한부여 하여 PV, PVC를 생성합니다.
먼저 JupyterNotebooks를 할당하기 위해서는 2가지의 사전사항이 필요하다.
1. Default StorageClass Object를 생성해야 한다.
StorageClass를 할당하는 이유는 JupyterNotebook의 저장소를 연결하기 위해서이다.
Default StorageClass를 통하여 JupyterNotebook이 생성하는 PVC와 PV를 연결할 수 있게 된다.
#StorageClass.yaml
kind: StorageClass
apiVersion: storage.k8s.io/v1
metadata:
          name: jupyter
          annotations:
                  storageclass.beta.kubernetes.io/is-default-class: "true"
provisioner: io.k8s.api.storage.v1.StorageClass
volumeBindingMode: WaitForFirstConsumer
위의 Code에서 가장 중요한 것은 storageclass.beta.kubernetes.io/is-default-class: “true”이다.
이 명령어로 인하여 생성된 StorageClass는 Default로서 선언될 수 있다.
kubectl apply -f StorageClass.yaml을 실행하게 되면 다음 화면을 확인할 수 있다.

2. JupyterNotebook과 연결할 PV를 선언하여야 한다.
마찬가지로 Object Spec을 정의하고 Object를 생성하도록 한다.
kind: PersistentVolume
apiVersion: v1
metadata:
        name: jupyter-volume3
spec:
        storageClassName: jupyter
        capacity:
                storage: 20Gi
        accessModes:
                - ReadWriteOnce
        hostPath:
                path: "/home/jovyan"
위에서 중요한 것은 2가지 이다.
- storageClassName: jupyter로서 Default Storageclass랑 같아야 PVC가 자동으로 연결될 수 있다.
- path: “/home/jovyan”으로서 지정하였다. JupyterNotebook을 생성할때 처음 Default 저장소이기 때문이다.
위와 같은 사실로인하여 실제 Kubeflow를 실제 Service에 배포하여도 사용자에게 CPU, GPU, 저장소 등을 관리자가 원하는대로 할당할 수 있다는 것을 의미한다.
생성하게되면 최종적인 화면은 다음과 같이 나오게 된다.

Jupyter Notebooks 실행
다음과 같은 간단한 예제를 돌려보자.
from tensorflow.examples.tutorials.mnist import input_data
mnist = input_data.read_data_sets("MNIST_data/", one_hot=True)
import tensorflow as tf

x = tf.placeholder(tf.float32, [None, 784])

W = tf.Variable(tf.zeros([784, 10]))
b = tf.Variable(tf.zeros([10]))

y = tf.nn.softmax(tf.matmul(x, W) + b)

y_ = tf.placeholder(tf.float32, [None, 10])
cross_entropy = tf.reduce_mean(-tf.reduce_sum(y_ * tf.log(y), reduction_indices=[1]))

train_step = tf.train.GradientDescentOptimizer(0.05).minimize(cross_entropy)

sess = tf.InteractiveSession()
tf.global_variables_initializer().run()

for _ in range(1000):
  batch_xs, batch_ys = mnist.train.next_batch(100)
  sess.run(train_step, feed_dict={x: batch_xs, y_: batch_ys})

correct_prediction = tf.equal(tf.argmax(y,1), tf.argmax(y_,1))
accuracy = tf.reduce_mean(tf.cast(correct_prediction, tf.float32))
print("Accuracy: ", sess.run(accuracy, feed_dict={x: mnist.test.images, y_: mnist.test.labels}))
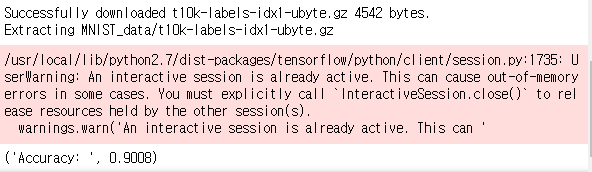
Warning이여도 잘 작동하는 것을 확인할 수 있다.
그렇다면 다운로드 받은 MNIST File도 직접 Access할 수 있는지 확인해 보자.
import os
print(os.getcwd())
/home/jovyan
위의 Code를 실행하면 아까 JupyterNotebook에서 지정한 Directory랑 같은 것을 확인할 수 있다.
실제 Local에서 확인해보면 잘 있는것을 확인할 수 있다.

마지막으로 GPU와 CPU를 둘 다 사용하는지 알아보기 위하여 다음과 같은 Code를 실행해 보자.
from tensorflow.python.client import device_lib
print(device_lib.list_local_devices())
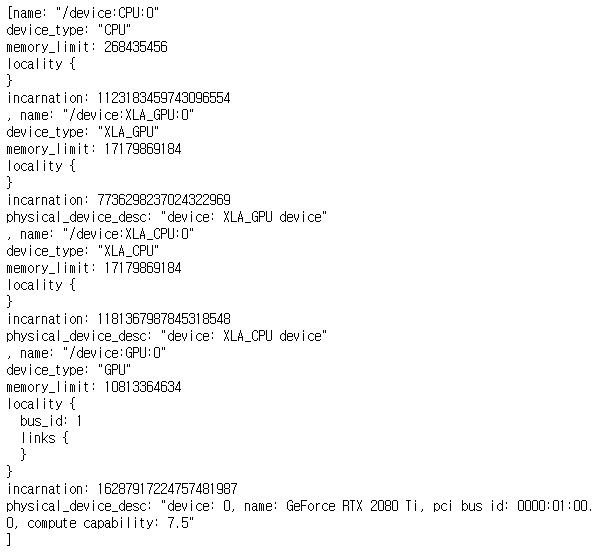
확인결과 다행이 CPU, GPU Device를 둘다 잘 잡아서 사용하는 것을 확인할 수 있다.
Jupyter Notebook Customize
Kubeflow 에서는 다음 링크에서 Jupyter Notebook을 Customize해서 사용할 수 있게 제공해 준다. Kubeflow Jupyter Notebook Customize GitHub
위의 링크에서 다운받은 File안에서 다음과 같은 명령어로서 Jupyter Notebook을 생성할 수 있다.
python3 build_image.py --registry=wjddyd66/custom-jupyter --tag=0.0.3 --tf_version=1.6.0 --platform=gpu tf_notebook
참고 사항
1. Version 주의
현재 모든 Jupyter의 Version을 제공하는 것은 아니다.
CPU, GPU 지원 하는 Version은 정해져있다.
- CPU: 1.4.1, 1.5.1, 1.6.0, 1.7.0, 1.8.0
- GPU: 1.4.1, 1.5.1, 1.6.0, 1.7.0, 1.8.0
2. Parameter
- registry: Docker registry
- tag: Docker tag
- tf_version: Tensorflow Version
- platform: GPU or CPU (Default: CPU)
- tf_notebook: Serving or JupyterNotebook Customize 둘 중 하나 선택
이제 Kubeflow에서 제공한 Dockerfile을 자신의 상황에 맞게 Customize하고 위의 명령어를 사용하면 원하는 JupyterNotebook으로 Customize하여 Docker Image로 만들 수 있다.
Docker File의 위치는 Kubeflow → components → tensorflow-notebook-image → Dockerfile
원본 Dockerfile을 살펴보면 다음과 같다.
# Copyright (c) Jupyter Development Team.
# Distributed under the terms of the Modified BSD License.

ARG BASE_IMAGE=tensorflow/tensorflow:1.13.2-py3-jupyter

FROM $BASE_IMAGE

ARG TF_SERVING_VERSION=0.0.0
ARG NB_USER=jovyan

# TODO: User should be refactored instead of hard coded jovyan

USER root

ENV DEBIAN_FRONTEND noninteractive

ENV NB_USER $NB_USER

ENV NB_UID 1000
ENV HOME /home/$NB_USER
ENV NB_PREFIX /


# Use bash instead of sh
SHELL ["/bin/bash", "-c"]

RUN apt-get update && apt-get install -yq --no-install-recommends \
  apt-transport-https \
  build-essential \
  bzip2 \
  ca-certificates \
  curl \
  g++ \
  git \
  gnupg \
  graphviz \
  locales \
  lsb-release \
  openssh-client \
  sudo \
  unzip \
  vim \
  wget \
  zip \
  emacs \
  python3-pip \
  python3-dev \
  python3-setuptools \
  && apt-get clean && \
  rm -rf /var/lib/apt/lists/*

# Install Nodejs for jupyterlab-manager
RUN curl -sL https://deb.nodesource.com/setup_12.x | sudo -E bash -
RUN apt-get update && apt-get install -yq --no-install-recommends \
  nodejs \
  && apt-get clean && \
  rm -rf /var/lib/apt/lists/*

ENV DOCKER_CREDENTIAL_GCR_VERSION=1.4.3
RUN curl -LO https://github.com/GoogleCloudPlatform/docker-credential-gcr/releases/download/v${DOCKER_CREDENTIAL_GCR_VERSION}/docker-credential-gcr_linux_amd64-${DOCKER_CREDENTIAL_GCR_VERSION}.tar.gz && \
    tar -zxvf docker-credential-gcr_linux_amd64-${DOCKER_CREDENTIAL_GCR_VERSION}.tar.gz && \
    mv docker-credential-gcr /usr/local/bin/docker-credential-gcr && \
    rm docker-credential-gcr_linux_amd64-${DOCKER_CREDENTIAL_GCR_VERSION}.tar.gz && \
    chmod +x /usr/local/bin/docker-credential-gcr

# Install AWS CLI
RUN curl "https://s3.amazonaws.com/aws-cli/awscli-bundle.zip" -o "/tmp/awscli-bundle.zip" && \
    unzip /tmp/awscli-bundle.zip && ./awscli-bundle/install -i /usr/local/aws -b /usr/local/bin/aws && \
    rm -rf ./awscli-bundle

RUN echo "en_US.UTF-8 UTF-8" > /etc/locale.gen && \
    locale-gen

ENV LC_ALL en_US.UTF-8
ENV LANG en_US.UTF-8
ENV LANGUAGE en_US.UTF-8

# Create NB_USER user with UID=1000 and in the 'users' group
# but allow for non-initial launches of the notebook to have
# $HOME provided by the contents of a PV
RUN useradd -M -s /bin/bash -N -u $NB_UID $NB_USER && \
    chown -R ${NB_USER}:users /usr/local/bin && \
    mkdir -p $HOME

RUN export CLOUD_SDK_REPO="cloud-sdk-$(lsb_release -c -s)" && \
    echo "deb https://packages.cloud.google.com/apt $CLOUD_SDK_REPO main" > /etc/apt/sources.list.d/google-cloud-sdk.list && \
    curl https://packages.cloud.google.com/apt/doc/apt-key.gpg | apt-key add - && \
    apt-get update && \
    apt-get install -y google-cloud-sdk kubectl

# Install Tini - used as entrypoint for container
RUN cd /tmp && \
    wget --quiet https://github.com/krallin/tini/releases/download/v0.18.0/tini && \
    echo "12d20136605531b09a2c2dac02ccee85e1b874eb322ef6baf7561cd93f93c855 *tini" | sha256sum -c - && \
    mv tini /usr/local/bin/tini && \
    chmod +x /usr/local/bin/tini

# NOTE: Beyond this point be careful of breaking out
# or otherwise adding new layers with RUN, chown, etc.
# The image size can grow significantly.

# Install base python3 packages
RUN pip3 --no-cache-dir install \
    jupyter-console==6.0.0 \
    jupyterlab \
    xgboost \
    git+https://github.com/kubeflow/fairing@a9bb9d5cc1c9f1d75efa31198ddbdccfe176b7bf

COPY --chown=jovyan:users requirements.txt /tmp

RUN docker-credential-gcr configure-docker && chown ${NB_USER}:users $HOME/.docker/config.json

# Configure container startup
EXPOSE 8888
USER jovyan
ENTRYPOINT ["tini", "--"]
CMD ["sh","-c", "jupyter notebook --notebook-dir=/home/${NB_USER} --ip=0.0.0.0 --no-browser --allow-root --port=8888 --NotebookApp.token='' --NotebookApp.password='' --NotebookApp.allow_origin='*' --NotebookApp.base_url=${NB_PREFIX}"]
위의 DockerFile에서 현재 환경에 맞게 변경한 Dockerfile 수정내용은 다음과 같다.
# Copyright (c) Jupyter Development Team.
# Distributed under the terms of the Modified BSD License.

ARG BASE_IMAGE=tensorflow/tensorflow:1.13.2-py3-jupyter

FROM $BASE_IMAGE

ARG TF_SERVING_VERSION=0.0.0
ARG NB_USER=jyhwang

# TODO: User should be refactored instead of hard coded jovyan

USER root

ENV DEBIAN_FRONTEND noninteractive

ENV NB_USER $NB_USER

ENV NB_UID 1000
ENV HOME /home/$NB_USER
ENV NB_PREFIX /


# Use bash instead of sh
SHELL ["/bin/bash", "-c"]

RUN apt-get update && apt-get install -yq --no-install-recommends \
  apt-transport-https \
  build-essential \
  bzip2 \
  ca-certificates \
  curl \
  g++ \
  git \
  gnupg \
  graphviz \
  locales \
  lsb-release \
  openssh-client \
  sudo \
  unzip \
  vim \
  wget \
  zip \
  emacs \
  python3-pip \
  python3-dev \
  python3-setuptools \
  && apt-get clean && \
  rm -rf /var/lib/apt/lists/*

# Install Nodejs for jupyterlab-manager
RUN curl -sL https://deb.nodesource.com/setup_12.x | sudo -E bash -
RUN apt-get update && apt-get install -yq --no-install-recommends \
  nodejs \
  && apt-get clean && \
  rm -rf /var/lib/apt/lists/*

ENV DOCKER_CREDENTIAL_GCR_VERSION=1.4.3
RUN curl -LO https://github.com/GoogleCloudPlatform/docker-credential-gcr/releases/download/v${DOCKER_CREDENTIAL_GCR_VERSION}/docker-credential-gcr_linux_amd64-${DOCKER_CREDENTIAL_GCR_VERSION}.tar.gz && \
    tar -zxvf docker-credential-gcr_linux_amd64-${DOCKER_CREDENTIAL_GCR_VERSION}.tar.gz && \
    mv docker-credential-gcr /usr/local/bin/docker-credential-gcr && \
    rm docker-credential-gcr_linux_amd64-${DOCKER_CREDENTIAL_GCR_VERSION}.tar.gz && \
    chmod +x /usr/local/bin/docker-credential-gcr


RUN echo "en_US.UTF-8 UTF-8" > /etc/locale.gen && \
    locale-gen

ENV LC_ALL en_US.UTF-8
ENV LANG en_US.UTF-8
ENV LANGUAGE en_US.UTF-8

# Create NB_USER user with UID=1000 and in the 'users' group
# but allow for non-initial launches of the notebook to have
# $HOME provided by the contents of a PV
RUN useradd -M -s /bin/bash -N -u $NB_UID $NB_USER && \
    chown -R ${NB_USER}:users /usr/local/bin && \
    mkdir -p $HOME && \
    chown -R ${NB_USER}:users $HOME

# Install Tini - used as entrypoint for container
RUN cd /tmp && \
    wget --quiet https://github.com/krallin/tini/releases/download/v0.18.0/tini && \
    echo "12d20136605531b09a2c2dac02ccee85e1b874eb322ef6baf7561cd93f93c855 *tini" | sha256sum -c - && \
    mv tini /usr/local/bin/tini && \
    chmod +x /usr/local/bin/tini

# NOTE: Beyond this point be careful of breaking out
# or otherwise adding new layers with RUN, chown, etc.
# The image size can grow significantly.

# Install base python3 packages
RUN pip3 --no-cache-dir install \
    jupyter-console \
    jupyterlab \
    ipython==7.0 \
    xgboost \
    git+https://github.com/kubeflow/fairing@a9bb9d5cc1c9f1d75efa31198ddbdccfe176b7bf

COPY --chown=jyhwang:users requirements.txt /tmp

RUN docker-credential-gcr configure-docker && chown ${NB_USER}:users $HOME/.docker/config.json

# Configure container startup
EXPOSE 8888
USER jyhwang
ENTRYPOINT ["tini", "--"]
CMD ["sh","-c", "jupyter notebook --notebook-dir=/$HOME --ip=0.0.0.0 --no-browser --allow-root --port=8888 --NotebookApp.token='' --NotebookApp.password='' --NotebookApp.allow_origin='*' --NotebookApp.base_url=${NB_PREFIX}"]
변경한 내용은 다음과 같다.
- Jovyan → jyhwang: 원하는 User로서 변경
chown -R ${NB_USER}:users $HOME추가: 이전 Issue 였던 Permission Denied 해결을 위한 Codejupyter-console \,ipython==7.0 \추가: 현재 Base Image는 Ubuntu 16.04 입니다. 따라서 Python3는 자동으로 3.5.2이므로 이에 맞는 Jupyter Version을 설정하여야 합니다.
위와 같이 변경한 Dockerfile을 바탕으로 Image를 생성하고 Push한다.
- DockerFile Build:
python3 build_image.py --registry=wjddyd66/custom-jupyter --tag=3.0.0 --tf_version=1.6.0 --platform=gpu tf_notebook - Docker Image를 Push 하기 위하여 Tag 및 repository 변경:
docker tag wjddyd66/custom-jupyter/tensorflow-1.6.0-notebook-gpu:3.0.0 wjddyd66/custom-jupyter:10.0.0 - Image Push:
docker psuh wjddyd66/custom-jupyter:10.0.0
주의 사항
Python 명령어로써 Build하여 올린 Image에 자동적으로 Tensorflow가 깔려있을 줄 알았는데 깔려있는 Package의 List에 Tensorflow 존재 X
Dockerfile변경을 잘못하였거나 Python에서 인수 전달을 못한 경우일 확률이 매우 높다. 따라서 수정한 Dockerfile에서 추가하고자 하는 Package와 Tensorflow를 추가하여 최종적인 Customizing된 Jupyter Image를 사용할 수 있다.
RUN pip3 --no-cache-dir install \
    jupyter-console \
    jupyterlab \
    tensorflow \
    ipython==7.0 \
    xgboost \
    git+https://github.com/kubeflow/fairing@a9bb9d5cc1c9f1d75efa31198ddbdccfe176b7bf
참조:Kubeflow-JupyterNotebooks
코드에 문제가 있거나 궁금한 점이 있으면 wjddyd66@naver.com으로 Mail을 남겨주세요.
Leave a comment