
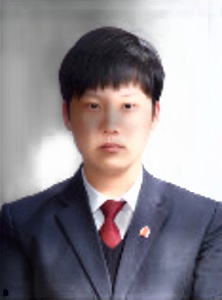
Paper22. Deep Single-Image Portrait Relighting Code
Deep Single-Image Portrait Relighting Code
요약: wjddyd66 Blog
출처: Deep Single-Image Portrait Relighting
코드: shhoper GitHub
Supplementary: Supplementary Material
Dataset: DPR Dataset
Dataset
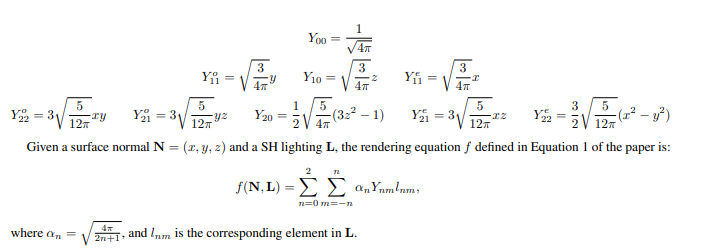
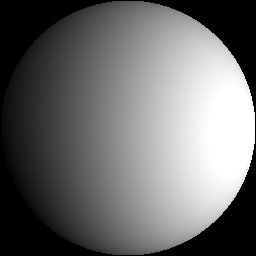
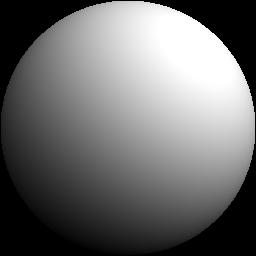
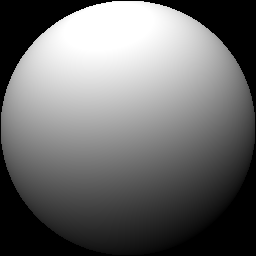
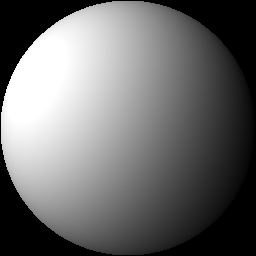
Spherical Harmonics Lighting
해당 논문에서 input으로 들어가는 Lighting같은 경우에는 Spherical Harmonics Lighting으로서 들어가게 되고, (x, y, z)기준으로 9개의 Input으로 들어가게 된다.
해당 9개의 좌표에 대해서는 다음과 같이 정의하게 된다.
실제 Code의 Light를 살펴보게 되어도 다음과 같이 적혀있게 된다.
1
2
3
4
5
6
7
8
9
1.084125496282453138e+00
-4.642676300617166185e-01
2.837846795150648915e-02
6.765292733937575687e-01
-3.594067725393816914e-01
4.790996460111427574e-02
-2.280054643781863066e-01
-8.125983081159608712e-02
2.881082012687687932e-01
conv 3x3 Block
해당 Network Architecture에서 사용되는 가장 기본이 되는 3x3 Convolution Layer이다.
1
2
3
4
def conv3X3(in_planes, out_planes, stride=1):
    """3x3 convolution with padding"""
    return nn.Conv2d(in_planes, out_planes, kernel_size=3, stride=stride,
        padding=1, bias=False)
BasicBlock
해당 Network Architecture에서 3x3 Convlution을 사용하여 가장 기본적인 Block단위를 만드는 작업이다.
가장 기본이 되는 Block으로서 Convolution Layer -> Batch Normalization -> Activation Function(ReLU) -> Convlution -> Batch Normalization -> Activation Function(ReLU)순으로 이루워지는 것을 살펴볼 수 있다.
1
2
3
4
5
6
7
8
9
10
11
12
13
14
15
16
17
18
19
20
21
22
23
24
25
26
27
28
29
30
31
32
class BasicBlock(nn.Module):
    def __init__(self, inplanes, outplanes, batchNorm_type=0, stride=1, downsample=None):
        super(BasicBlock, self).__init__()
        # batchNorm_type 0 means batchnormalization
        #                1 means instance normalization
        self.inplanes = inplanes
        self.outplanes = outplanes
        self.conv1 = conv3X3(inplanes, outplanes, 1)
        self.conv2 = conv3X3(outplanes, outplanes, 1)
        if batchNorm_type == 0:
            self.bn1 = nn.BatchNorm2d(outplanes)
            self.bn2 = nn.BatchNorm2d(outplanes)
        else:
            self.bn1 = nn.InstanceNorm2d(outplanes)
            self.bn2 = nn.InstanceNorm2d(outplanes)

        self.shortcuts = nn.Conv2d(inplanes, outplanes, kernel_size=1, stride=1, bias=False)

    def forward(self, x):
        out = self.conv1(x)
        out = self.bn1(out)
        out = F.relu(out)
        out = self.conv2(out)
        out = self.bn2(out)

        if self.inplanes != self.outplanes:
        		out += self.shortcuts(x)
        else:
        		out += x

        out = F.relu(out)
        return out
Light Network
해당 Code는 크게 3가지로 이루워져있다.
- Input Feature에서 Light의 요소를 찾아내는 부분이다. =>
x = innerFeat[:,0:self.ncInput,:,:]로서 0~x 까지의 Channel을 Light를 예측하기 위한 Channel로서 사용하는 것을 알 수 있다. - Input Image의 Light를 Prediction하기 위하여, 학습되는 Layer가 있는 것을 알 수 있다. Input Image의 Light는
light = self.predict_FC2(light)로서 나오게 된다. - Target Light를 Input의 Light와 대체하는 것을 살펴볼 수 있다.
innerFeat[:,0:self.ncInput,:,:] = upFeat로서 Output을 사용하는 것을 알 수 있다.
즉, Light Network는 Input으로 들어오는 Feature에서 Light부분을 Selection하고, 이러한 Light를 Target하고자 하는 Light로서 대체하는 것을 알 수 있다.
Appendix. PReLU (Parametric ReLU)
PReLU는 Leakly ReLU다음에 나온 값으로서 다음과 같은 기능을 가진다.
$$ f(x)= \begin{cases} \alpha y, & \mbox{if }x >0 \\ y, & \mbox{if }x \leq0 \end{cases} $$
식은 Leakly ReLU와 같으나, \(\alpha\)를 학습할 수 있는 Parameter로서 사용하는 Activation Function이다. Delving Deep into Rectifiers: Surpassing Human-Level Performance on ImageNet Classification논문에 자세히 나와있다고 하는데, 아직 읽어보지는 않았다.
PReLU는 아래와 같은 그림으로서 나타낼 수 있다.
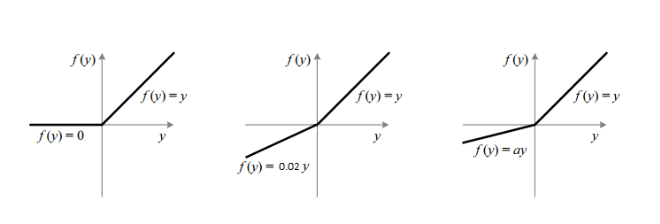
그림 참조: JINSOL KIM Blog
1
2
3
4
5
6
7
8
9
10
11
12
13
14
15
16
17
18
19
20
21
22
23
24
25
26
27
28
29
30
31
32
33
34
35
36
37
38
class lightingNet(nn.Module):
    '''
        define lighting network
    '''
    def __init__(self, ncInput, ncOutput, ncMiddle):
        super(lightingNet, self).__init__()
        self.ncInput = ncInput
        self.ncOutput = ncOutput
        self.ncMiddle = ncMiddle

        # basic idea is to compute the average of the channel corresponding to lighting
        # using fully connected layers to get the lighting
        # then fully connected layers to get back to the output size

        self.predict_FC1 = nn.Conv2d(self.ncInput,  self.ncMiddle, kernel_size=1, stride=1, bias=False)
        self.predict_relu1 = nn.PReLU()
        self.predict_FC2 = nn.Conv2d(self.ncMiddle, self.ncOutput, kernel_size=1, stride=1, bias=False)

        self.post_FC1 = nn.Conv2d(self.ncOutput,  self.ncMiddle, kernel_size=1, stride=1, bias=False)
        self.post_relu1 = nn.PReLU()
        self.post_FC2 = nn.Conv2d(self.ncMiddle, self.ncInput, kernel_size=1, stride=1, bias=False)
        self.post_relu2 = nn.ReLU()  # to be consistance with the original feature

    def forward(self, innerFeat, target_light, count, skip_count):
        x = innerFeat[:,0:self.ncInput,:,:] # lighting feature
        _, _, row, col = x.shape

        # predict lighting
        feat = x.mean(dim=(2,3), keepdim=True)
        light = self.predict_relu1(self.predict_FC1(feat))
        light = self.predict_FC2(light)

        # get back the feature space
        upFeat = self.post_relu1(self.post_FC1(target_light))
        upFeat = self.post_relu2(self.post_FC2(upFeat))
        upFeat = upFeat.repeat((1,1,row, col))
        innerFeat[:,0:self.ncInput,:,:] = upFeat
        return innerFeat, innerFeat[:, self.ncInput:, :, :], light
Hourglass Block
Hourglass Network를 만들기 위하여 사용되는 기본적인 Block이다.
MiddleNet을 Skip Connection을 out = out_lower + out_upper로서 표현하는 것을 알 수 있다.
1
2
3
4
5
6
7
8
9
10
11
12
13
14
15
16
17
18
19
20
21
22
23
24
25
26
27
28
29
30
31
32
33
34
35
36
37
38
39
40
41
42
class HourglassBlock(nn.Module):
    '''
        define a basic block for hourglass neetwork
            ^-------------------------upper conv-------------------
            |                                                      |
            |                                                      V
        input------>downsample-->low1-->middle-->low2-->upsample-->+-->output
        NOTE about output:
            Since we need the lighting from the inner most layer,
            let's also output the results from middel layer
    '''
    def __init__(self, inplane, mid_plane, middleNet, skipLayer=True):
        super(HourglassBlock, self).__init__()
        # upper branch
        self.skipLayer = True
        self.upper = BasicBlock(inplane, inplane, batchNorm_type=1)

        # lower branch
        self.downSample = nn.MaxPool2d(kernel_size=2, stride=2)
        self.upSample = nn.Upsample(scale_factor=2, mode='nearest')
        self.low1 = BasicBlock(inplane, mid_plane)
        self.middle = middleNet
        self.low2 = BasicBlock(mid_plane, inplane, batchNorm_type=1)

    def forward(self, x, light, count, skip_count):
        # we use count to indicate wich layer we are in
        # max_count indicates the from which layer, we would use skip connections
        out_upper = self.upper(x)
        out_lower = self.downSample(x)
        out_lower = self.low1(out_lower)
        out_lower, out_feat, out_middle = self.middle(out_lower, light, count+1, skip_count)
        out_lower = self.low2(out_lower)
        out_lower = self.upSample(out_lower)

        if count >= skip_count and self.skipLayer:
            # withSkip is true, then we use skip layer
            # easy for analysis
            out = out_lower + out_upper
        else:
            out = out_lower
            #out = out_upper
        return out, out_feat, out_middle
Hourglass Network
Hourglass Block과 Light Network를 활용하여서 Hourglass Network를 만드는 과정이다.
중요하게 살펴볼 부분은 다음과 같다.
1
2
3
4
5
# number of channles for output of lighting network
if gray:
    self.ncOutLight = 9  # gray: channel is 1
else:
    self.ncOutLight = 27  # color: channel is 3
위의 그림과 같이 Channel을 지정하는 이유는 SH Light를 9개의 Channel로서 좌표를 잡기 때문에, 만약 Color Channel이 되면, 3x9=27로서 지정하는 것을 알 수 있다.
또한, Middle Net의 dimension중 하나는 self.ncHG0 = 8*self.baseFilter + self.ncLight로서 지정하여 Light를 추가적인 Input으로서 학습 가능하게 Setting하는 것을 알 수 있다.
1
2
3
4
5
6
7
8
9
10
11
12
13
14
15
16
17
18
19
20
21
22
23
24
25
26
27
28
29
30
31
32
33
34
35
36
37
38
39
40
41
42
43
44
45
46
47
48
49
50
51
52
53
54
55
56
57
58
59
60
61
62
63
class HourglassNet(nn.Module):
    '''
    	basic idea: low layers are shared, upper layers are different
    	            lighting should be estimated from the inner most layer
        NOTE: we split the bottle neck layer into albedo, normal and lighting
    '''
    def __init__(self, baseFilter = 16, gray=True):
        super(HourglassNet, self).__init__()

        self.ncLight = 27   # number of channels for input to lighting network
        self.baseFilter = baseFilter

        # number of channles for output of lighting network
        if gray:
            self.ncOutLight = 9  # gray: channel is 1
        else:
            self.ncOutLight = 27  # color: channel is 3

        self.ncPre = self.baseFilter  # number of channels for pre-convolution

        # number of channels
        self.ncHG3 = self.baseFilter
        self.ncHG2 = 2*self.baseFilter
        self.ncHG1 = 4*self.baseFilter
        self.ncHG0 = 8*self.baseFilter + self.ncLight

        self.pre_conv = nn.Conv2d(1, self.ncPre, kernel_size=5, stride=1, padding=2)
        self.pre_bn = nn.BatchNorm2d(self.ncPre)

        self.light = lightingNet(self.ncLight, self.ncOutLight, 128)
        self.HG0 = HourglassBlock(self.ncHG1, self.ncHG0, self.light)
        self.HG1 = HourglassBlock(self.ncHG2, self.ncHG1, self.HG0)
        self.HG2 = HourglassBlock(self.ncHG3, self.ncHG2, self.HG1)
        self.HG3 = HourglassBlock(self.ncPre, self.ncHG3, self.HG2)

        self.conv_1 = nn.Conv2d(self.ncPre, self.ncPre, kernel_size=3, stride=1, padding=1)
        self.bn_1 = nn.BatchNorm2d(self.ncPre)
        self.conv_2 = nn.Conv2d(self.ncPre, self.ncPre, kernel_size=1, stride=1, padding=0)
        self.bn_2 = nn.BatchNorm2d(self.ncPre)
        self.conv_3 = nn.Conv2d(self.ncPre, self.ncPre, kernel_size=1, stride=1, padding=0)
        self.bn_3 = nn.BatchNorm2d(self.ncPre)

        self.output = nn.Conv2d(self.ncPre, 1, kernel_size=1, stride=1, padding=0)

    def forward(self, x, target_light, skip_count, oriImg=None):
        #feat = self.pre_conv(x)
        #feat = F.relu(self.pre_bn(feat))
        feat = x
        # get the inner most features
        feat, out_feat, out_light = self.HG3(feat, target_light, 0, skip_count)
        #feat = F.relu(self.bn_1(self.conv_1(feat)))
        #feat = F.relu(self.bn_2(self.conv_2(feat)))
        #feat = F.relu(self.bn_3(self.conv_3(feat)))
        #out_img = self.output(feat)
        #out_img = torch.sigmoid(out_img)

        # for training, we need the original image
        # to supervise the bottle neck layer feature
        out_feat_ori = None
        if not oriImg is None:
            _, out_feat_ori, _ = self.HG3(oriImg, target_light, 0, skip_count)

        return out_feat, out_light, out_feat_ori, feat
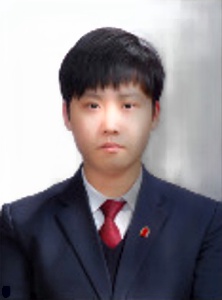
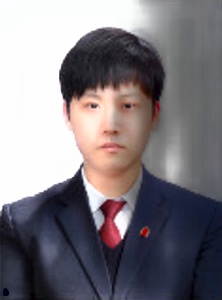
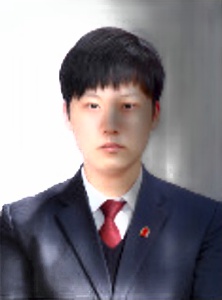
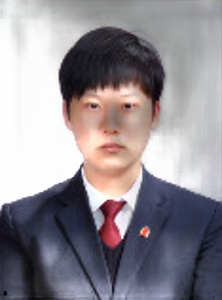
Demo
 |
 |
 |
 |
 |
 |
 |
 |
 |
 |
 |
 |
 |
 |
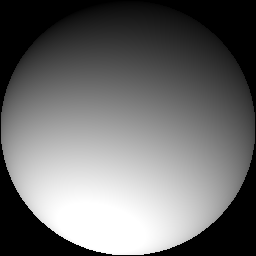
Appendix. Prediction Light
out_feat, out_light, out_feat_ori, feat을 통하여 Prediction Light를 뽑아낼 수 있다.
실제 Data Light Example과 비교하면 Prediction값은 다음과 같다.
rotate_light_06.txt
1
2
3
4
5
6
7
8
9
1.084125496282453138e+00
-4.642676300617169516e-01
-5.112381993903207800e-01
4.439962822886048266e-01
-1.866289387481862572e-01
3.108669041197227867e-01
2.021743042675238355e-01
-3.148681770175290051e-01
3.974379604123656762e-02
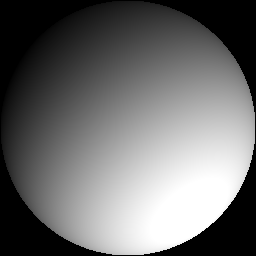
Prediction Light
1
2
3
4
5
6
7
8
9
1.0538
-0.0677
0.2029
-0.0827
-0.0251
0.1095
-0.1481
0.0259
-0.0124
Limitation
Prediction의 Light는 Output을 기준으로 Light를 뽑아낸 결과값이기 때문에, 값이 다른 것을 알 수 있다. 심지어 Direction이 다른 부분또한 있는 것을 알 수 있다.
Leave a comment